User Interface
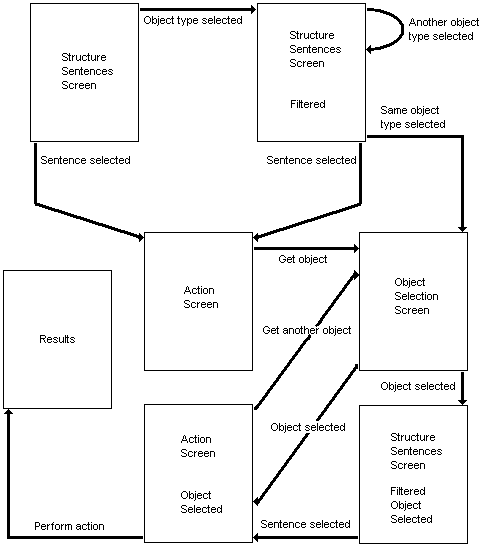
One of the main parts of the generator that has to be built is the user interface. This is the representation of the generator to the user. The user interface consists out of several php files. Some will be built statically and some dynamically. Before we go on and discuss the user interface in detail I must note that the pictures shown are not screenshots. The pictures may help you to visualize the functionality that lies within the user interface.

Let us first discuss the general content of the screens. If someone has logged into the system, that person will be shown at the top of the screens in the user interface. That way a user can check that the login was successful. Or another user can see that someone else has already logged into the system and must first logout before he can perform his or her tasks.
The current date and time are also shown at the top of the screens. Each task that is performed and all objects that are changed are saved in the database with a timestamp. So you can look up when an object has changed or an action was performed. It’s shown for convenience.
The screens will have the same theme. All the background colors in the different screens are the same, the font types, the font colors, the shapes, etc. Only the content and the title of each screen are different. We are developing only one theme at the moment, but we may implement more in future versions. We have already developed a little program called css maker, which is used to build up a customized style sheet. This style sheet file will be included by the php files of the user interface. If you make changes to the style sheet, the whole user interface will look different!
Let us now gaze at the first screen of the user interface: the ‘structure sentence selection’ screen.
Screen 1: Structure sentence selection
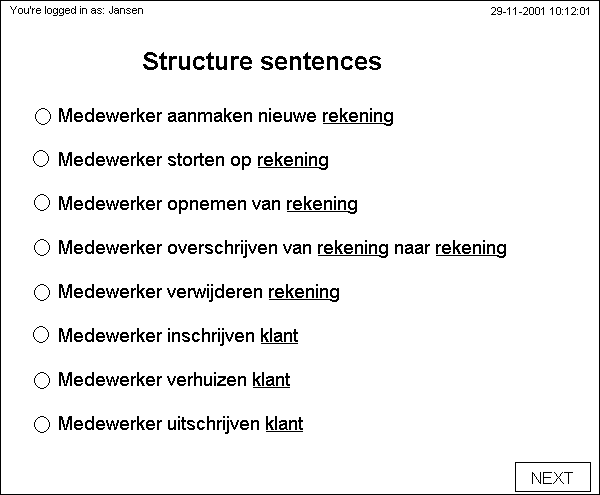
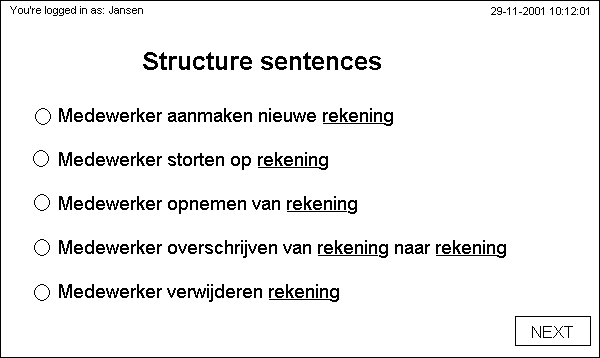
The actual first screen that the user gets to see is the login screen, but this screen is not part of the user interface. It handles the authority issues. The person that has logged into the system is ‘Jansen’. Dependent on the level of authorization that ‘Jansen’ has, a selection of structure sentences are being shown in this screen. These sentences describe what tasks a person can perform. To carry out a task, the user has to select a sentence via the radio button and then click the ‘next’ button. If a user clicks on an object type (underlined) the ‘structure sentence selection’ screen will reload and will filter the sentences and show only those sentences which have the selected object in it. This is a neat function, because this filtering can reduce the sentences considerably. After the login Jansen has 5 sentences concerning the object type ‘Rekening’ and 3 concerning the object type ‘Klant’. If he clicks on ‘Rekening’ the following screen will be shown:
Screen 2: Structure sentence selection, filtered
In this example the number of sentences are not that many, so a there was already a clear view of what ‘Jansen’ could chose. In practice though, the number of sentences can be enormous. So a filtering option can come in handy. If a sentence has more object types a user can filter again by clicking on another object type. If the user has filtered enough he can choose a sentence by selecting the radio button left from it and click on the ‘Next’ button. If Jansen clicks on the same objecttype, which has already been filtered, he will go to the ‘object selection’ screen:
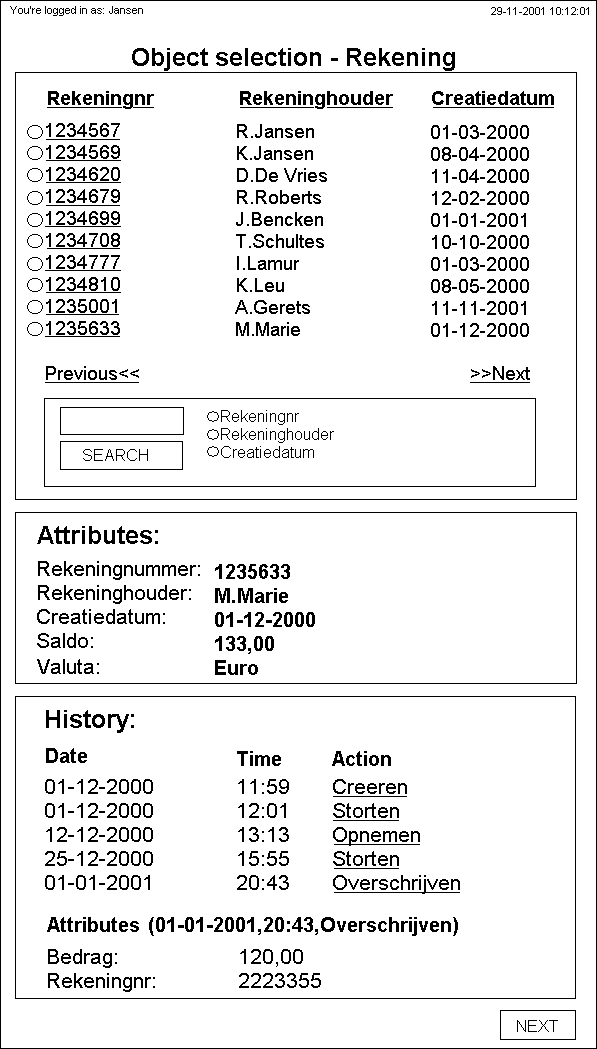
In the object selection screen, the user can choose the instance of the object type which is part of the task. Or several if the multiplicity is above 1, the radio buttons will then change into check boxes. The first 10 objects are shown. The user can cycle through the objects by clicking next or previous, he can sort the objects by clicking on the attributes above and he can search for objects using the search command. The attributes shown above are preselected in the model builder. If a user clicks on an object the attributes of that object are shown below. This can help the user in finding the right object. Another part of the ‘object selection’ screen is the history. The user can view the history of the object selected. By clicking on an action the user can see the action attributes.
The user select an object by clicking the radio button in front of the object instance and then click on the ‘next’ button.
The user has now selected a specific object and will return to the ‘structure sentence selection’ screen:
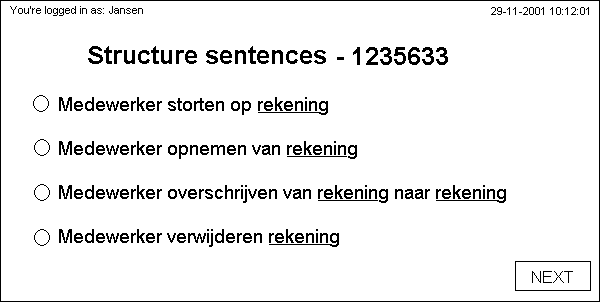
Screen 4: Structure sentence selection, filtered, object selected
He now only sees the structure sentences where the object 123566 can be part of. He can select a sentence by clicking the radio button in front of the sentence and click the ‘next’ button.
So the user has many ways to filter the structure sentences. At a certain moment the user will know what task he will perform and clicks on the ‘next’ button. The action screen is shown:
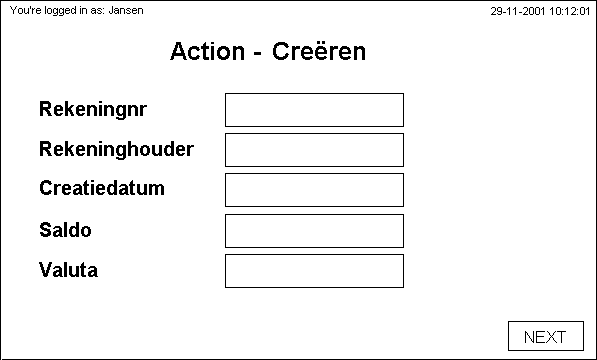
Screen 5: Action screen - creeren
The user can fill in the attributes for the action in this screen. All attributes of the action will be shown here. Some attributes are required, these will have a ‘*’ after the attributename postfixed. After the user has filled in the fields, he can click the ‘next’ button to complete the task. In this case the action is one where an object is created. You can also have an action like this:
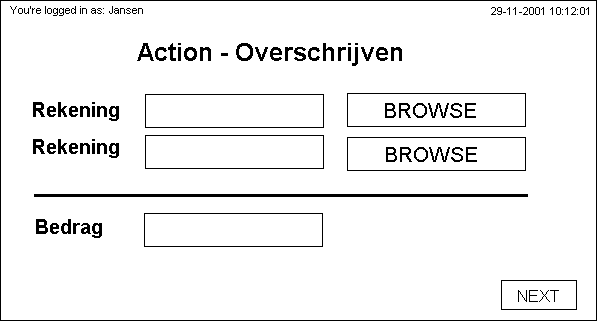
Screen 6: Action screen – overschrijven
In this case some objects are part of the action. If the multiplicity of the objecttype is above 1, a memobox is shown instead of an editbox. The user can fill in the objects directly, or he can browse and search for an object. If the user chooses to do this the ‘object selection screen’ (figure 3) is shown. The object can also already be filled in, this is the case when a user selects the object first and then chooses the action as described above. If all objects and attributes has been filled in the user clicks on the ‘next’ button and the following screen is shown:

Screen 7: Results screen
The user gets to see if the action was succesfully performed or not. From here the user can choose to finish or go on. If he clicks the ‘finish’ button he will go to screen 1. If he chooses to go on, he will go to the ‘structure sentence selection’ screen but filtered with the object just created or selected.
We will now discuss what should be implemented in future versions of the user interface. In the case of dividing money to different persons, a user should be given the option to select how much money will go to one person and how much to another person. In this version it’s not possible to do this, because the functionality is not yet implemented in the system. So the user interface can’t possible know which actions have such attributes.
In the introduction I already mentioned themes. There can be developed a theme builder. This program can produce themes which can be used by the user interface. A user can then customize the entire pages to fit in a certain company.
The user interface is at the moment php based, there may be the wish to make a user interface with for example asp pages or a future scripting language. The user can choose the specific language in the modelbuilder and it then generates the necessary files.